
How to Make Flower Sprinkles at Home: A Fun and Easy DIY Guide
Transform your baking game with our easy DIY guide on making flower sprinkles at home! Learn how to create stunning edible flower confetti using simple ingredients and step-by-step instructions that show you how to prep, dry, and crumble your favorite edible flowers. Whether you're decorating cupcakes, cakes, or ice cream, these vibrant sprinkles add a touch of natural beauty and a burst of flavor to any treat. Perfect for novice bakers and creative pros alike, our guide also delves into the benefits of baking with edible flowers and offers tips on sourcing and storing your homemade sprinkles. Get ready to sprinkle a little magic over your desserts and bring a garden-fresh twist to every recipe!
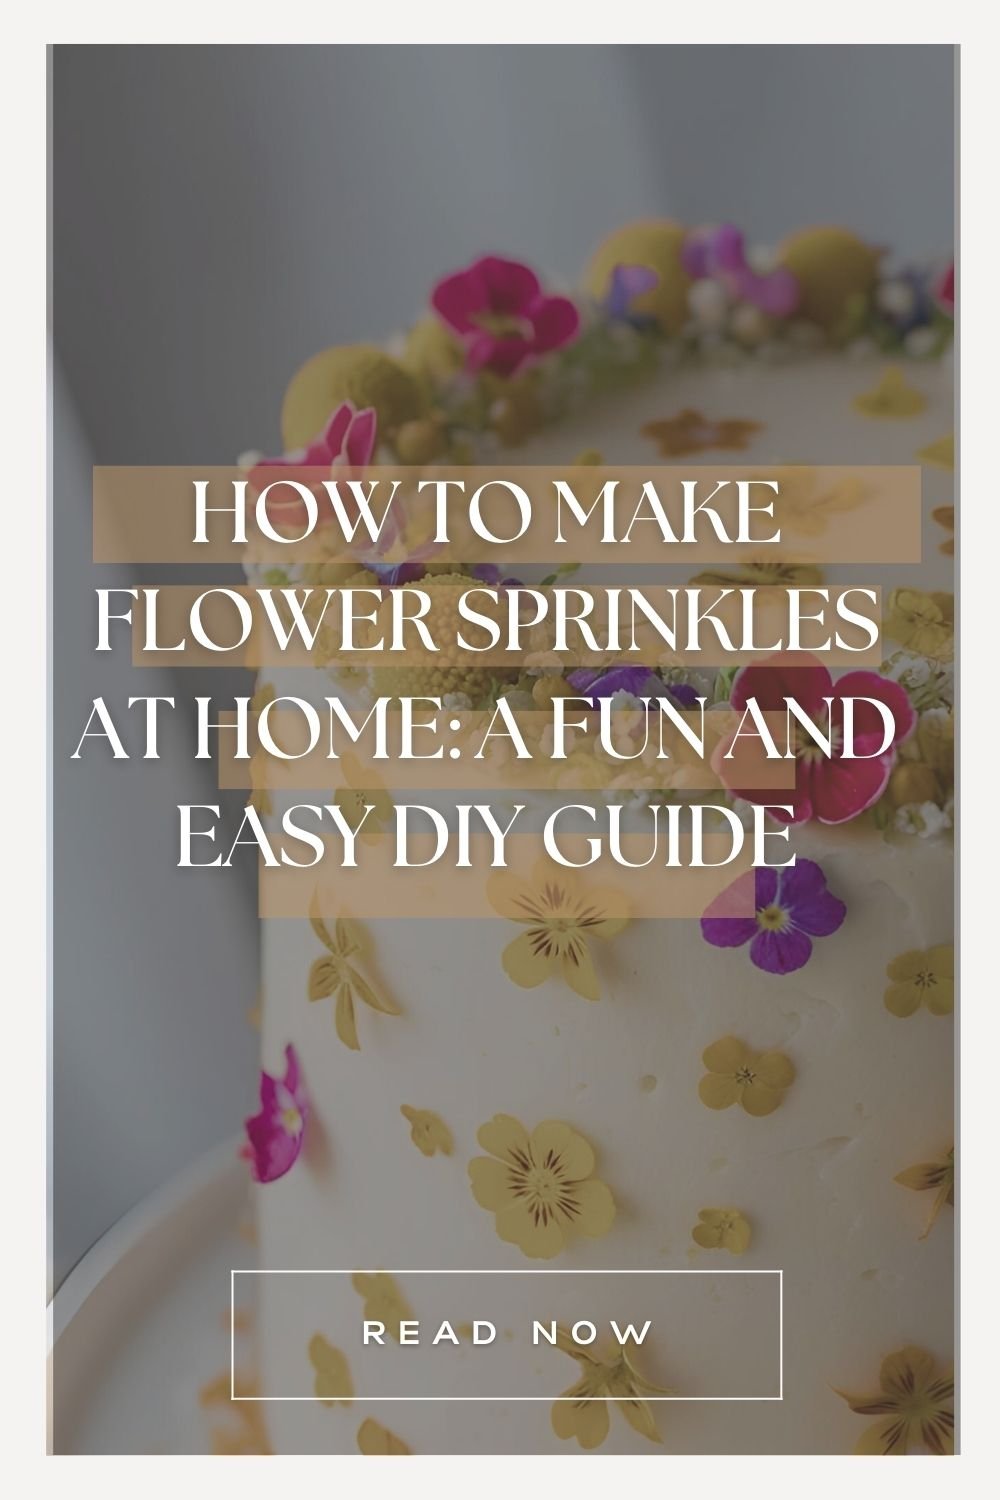
Hey there! Just a quick heads-up: some links in this post are affiliate links, which means I earn a small commission if you make a purchase through them—at no extra cost to you. I only share products and services that I truly love and trust. Your support helps me keep sharing fun DIY projects and creative recipes. Thanks so much for being awesome!Like every Netflix-loving gal, I fell head over heels for Duchess Meghan of Sussex the moment she introduced her flower sprinkles. I was beyond excited to snag something from her AsEver launch—until it sold out in under an hour, leaving me heartbroken. But rather than wait around for the restock, I decided to roll up my sleeves and make my own. And guess what? I’m here to show you how to do it, too! #notallqueenswearcrownsbutwedohavesprinkles.
I’m all about making life a little sweeter—and nothing says “sweet” like adding a burst of color and flavor to your favorite desserts. That’s where flower sprinkles come in. These dainty little accents, also known as edible flower confetti, not only look whimsical but also invite that fresh, natural vibe into your baking. And the best part? You don’t have to be a professional pastry chef to make them. In fact, in this post, I’m going to walk you through exactly how to make flower sprinkles at home—no fancy equipment required.
By the way, if you’re anything like me, you’ll love how these tiny pops of color can elevate your goodies. It’s the perfect weekend project to do solo (think: self-care in the kitchen), or with your family and friends. Ready to get started? Let’s dive in.
Why Make Your Own Flower Sprinkles?
I’m all about adding personal flair to the things I create, which is why I adore DIY flower sprinkles. When you choose to make them yourself, you’re in control of the colors, flavors, and quantity. Plus, you can pick the exact edible flowers that speak to your heart—or that perfectly match your next celebration.
Beyond the fun factor, homemade sprinkles let you experiment in ways store-bought options just can’t match. You can color-coordinate them with birthday party themes, match them to wedding décor, or simply whip them up for a random Tuesday pick-me-up. After all, who says a sprinkle of pretty blooms can’t brighten an ordinary day?

Gathering Your Supplies
Let’s start with the basics. Here’s what you’ll need for this baking with edible flowers adventure:
Edible Flowers: The star of the show. Some top picks include pansies, violets, marigolds, roses, and nasturtiums. Just be sure they’re truly edible and haven’t been sprayed with any chemicals.
Granulated or Powdered Sugar (Optional): If you want to add a sweet, sparkly coating to your petals.
Water or Egg White (Optional): A tiny brush of moisture helps sugar stick to the flower petals.
Baking Tray + Parchment Paper: Perfect for laying out the petals to dry.
Oven or Dehydrator: For gently drying the petals. If you prefer a super low-key approach, you can also air-dry them at room temperature, though it takes longer — click to see my favorite dehydrator!

Step-by-Step: How to Make Flower Sprinkles at Home
1. Prep Your Petals
Give your edible flowers a good rinse under cold water to remove any dirt or lingering critters, then pat them dry. Remove stems, pistils, and stamens if you prefer to work with just the petals. This can be a relaxing process—think of it as a mini mindfulness session in your kitchen!
2. Optional Sweet Coating
If you’re aiming for a cute, sugar-crusted look, brush each petal lightly with water or egg white. Sprinkle a pinch of granulated or powdered sugar over the petals. This step creates a more pronounced “sprinkle” vibe once dried, adding both crunch and sweetness.
3. Dry ‘Em Out
Now, choose your drying method:
Air Dry: Spread petals on parchment paper in a single layer, leaving them in a cool, dry spot for two to three days.
Oven Dry: Set your oven to the lowest temperature (around 175–200°F). Line a baking tray with parchment paper, place your petals on top, and pop them in for 10–15 minutes, checking frequently so they don’t brown or burn.
Dehydrator: If you have one, this is a simple, foolproof way to dry them. Just follow the manufacturer’s instructions.
4. Crumble into Confetti
Once the petals are fully dried, gently crumble them into smaller pieces. This is where the magic happens—they start looking like tiny fireworks in your hand. These are your official flower sprinkles, ready to turn your baked goods into something special.

Ways to Use Your New DIY Flower Sprinkles
Cupcakes and Cookies: Top them on frosted cupcakes or sugar cookies for a pop of color. It’s a sweet surprise that’ll have your guests wondering how you became a baking superstar overnight.
Smoothie Bowls and Yogurt: Mornings become more cheerful when your breakfast looks like it’s straight out of a café. A light sprinkling over your smoothie bowl or yogurt parfait can do just that.
Cakes for Special Occasions: Birthdays, anniversaries, or simple weekend get-togethers become that much more memorable when your cake is adorned with vibrant edible flower confetti.
Ice Cream Sundaes: A handful of flower sprinkles on your favorite ice cream sundae can make the treat feel downright dreamy.
Crafty Cocktails or Mocktails: Sip pretty! Freeze petals into ice cubes, or float a few sprinkles right on top for a picture-perfect party drink.

Pro Tips to Keep in Mind
Sourcing Flowers: Always ensure you’re using food-grade, pesticide-free flowers. If in doubt, consult a reputable supplier or grocery store produce section.
Color Coordination: Different flowers keep their color in varying ways. For example, pansies and violas often retain bright hues even after drying. Feel free to experiment to find your favorites.
Allergies: Check for allergies (both in yourself and those you’ll be serving) before going all-out with baking with edible flowers.
Storage: Keep your homemade sprinkles in an airtight container. They’ll last a few weeks, possibly longer—though you might use them up before then!
Why This DIY Is So Worth It
There’s something uplifting about working with nature’s own palette. For me, crafting my own flower sprinkles is an invitation to slow down and really appreciate beauty in the small things—like a tiny bloom that can brighten up an entire cake. Plus, it’s an excellent way to bring a piece of the outdoors into your kitchen, no matter the season.
When people see my cookies or cupcakes dotted with these delicate flecks of color, the reaction is often a mix of delight and curiosity. It’s a fantastic conversation starter that leads to questions about which flowers are edible, how you made them, and which flavors pair best.
Best of all, these homemade DIY flower sprinkles are straightforward enough for new crafters but also hold endless possibilities for seasoned creatives. You can mix and match flower varieties, play with sugar coatings, and even incorporate herbs like lavender for a subtle hint of flavor.

List of 20 Edible Flowers
Below is a list of 20 edible flowers you can explore for your culinary and decorative adventures — also, learn how you can add them to. your garden this season here.
Roses – Their petals add a delicate, aromatic flavor to desserts, teas, and salads.
Pansies – Mild and colorful, perfect for decorating cakes and salads.
Violets – Sweet and fragrant, ideal for garnishing and making candied treats.
Nasturtiums – With a peppery zing, their bright blossoms work well in salads and as a garnish.
Calendula (Pot Marigold) – Tangy and vibrant, used in salads, soups, or even infused into oils.
Chamomile – Known for its calming properties, its blossoms are best used in teas and desserts.
Lavender – Fragrant with subtle citrus notes, great in baked goods and infused beverages.
Hibiscus – Tart and vibrant, ideal for teas, syrups, and colorful culinary creations.
Borage – Cucumber-flavored and refreshing, perfect for garnishing salads or cocktails.
Dandelion – Both the flowers and greens are edible; the flowers add a mild, sweet flavor to dishes.
Elderflower – Delicate and aromatic, it’s wonderful in cordials, desserts, and teas.
Squash Blossoms – Savory and tender, these are excellent when stuffed or lightly fried.
Carnations – If organically grown, their petals can be used sparingly in salads for a hint of spice.
Bee Balm (Monarda) – Vibrant and flavorful, ideal for infusing into teas or using as an edible garnish.
Fennel Flowers – Offering a subtle licorice note, they’re best used as a light garnish in salads.
Lilac Blossoms – Fragrant and mildly sweet, they work well in syrups and jellies.
Chrysanthemum Petals – Certain edible varieties add a unique flavor to teas and salads.
Sunflower Petals – With a slightly sweet taste, they provide a delightful crunch in salads.
Orchid Blossoms – Select edible varieties are used for elegant garnishes and in gourmet dishes.
Clover Flowers – Mildly sweet, they’re perfect as a subtle garnish or for a splash of color in tea.
Always ensure that any edible flowers you plan to use are grown organically and are identified as safe for consumption. Enjoy experimenting with these natural beauties in your recipes and creative projects!
Let’s Sprinkle Some Joy
Now that you know how to make flower sprinkles at home, it’s time to roll up your sleeves and dive in. Whether you’re a baking newbie or a seasoned pro, this is a low-stakes, high-fun project that yields both aesthetic and delicious rewards. So, grab those edible flowers, prepare your sugar (if you’re a sweet fanatic like me), and let’s sprinkle some natural beauty onto our treats.
Remember, life is all about the little moments—so make them bright, colorful, and undeniably you. Enjoy your baking journey, and may your kitchen be filled with sweet smells, vibrant colors, and plenty of good vibes.
Happy baking, friends!
This post was all about creating DIY flower sprinkles. It is a fun and easy DIY guide.


Top 10 Family-Friendly Outdoor DIY Projects: Neutral Planting Stations and Garden Beds for Ultimate Summer Fun
Looking for simple, stylish ways to keep the kids engaged this summer? From minimalist planting stations to raised garden beds, these 10 family-friendly outdoor DIY projects are equal parts fun and functional. Designed with neutral aesthetics in mind, each activity invites creativity, teamwork, and a whole lot of sunshine—perfect for making backyard memories that last all season long.
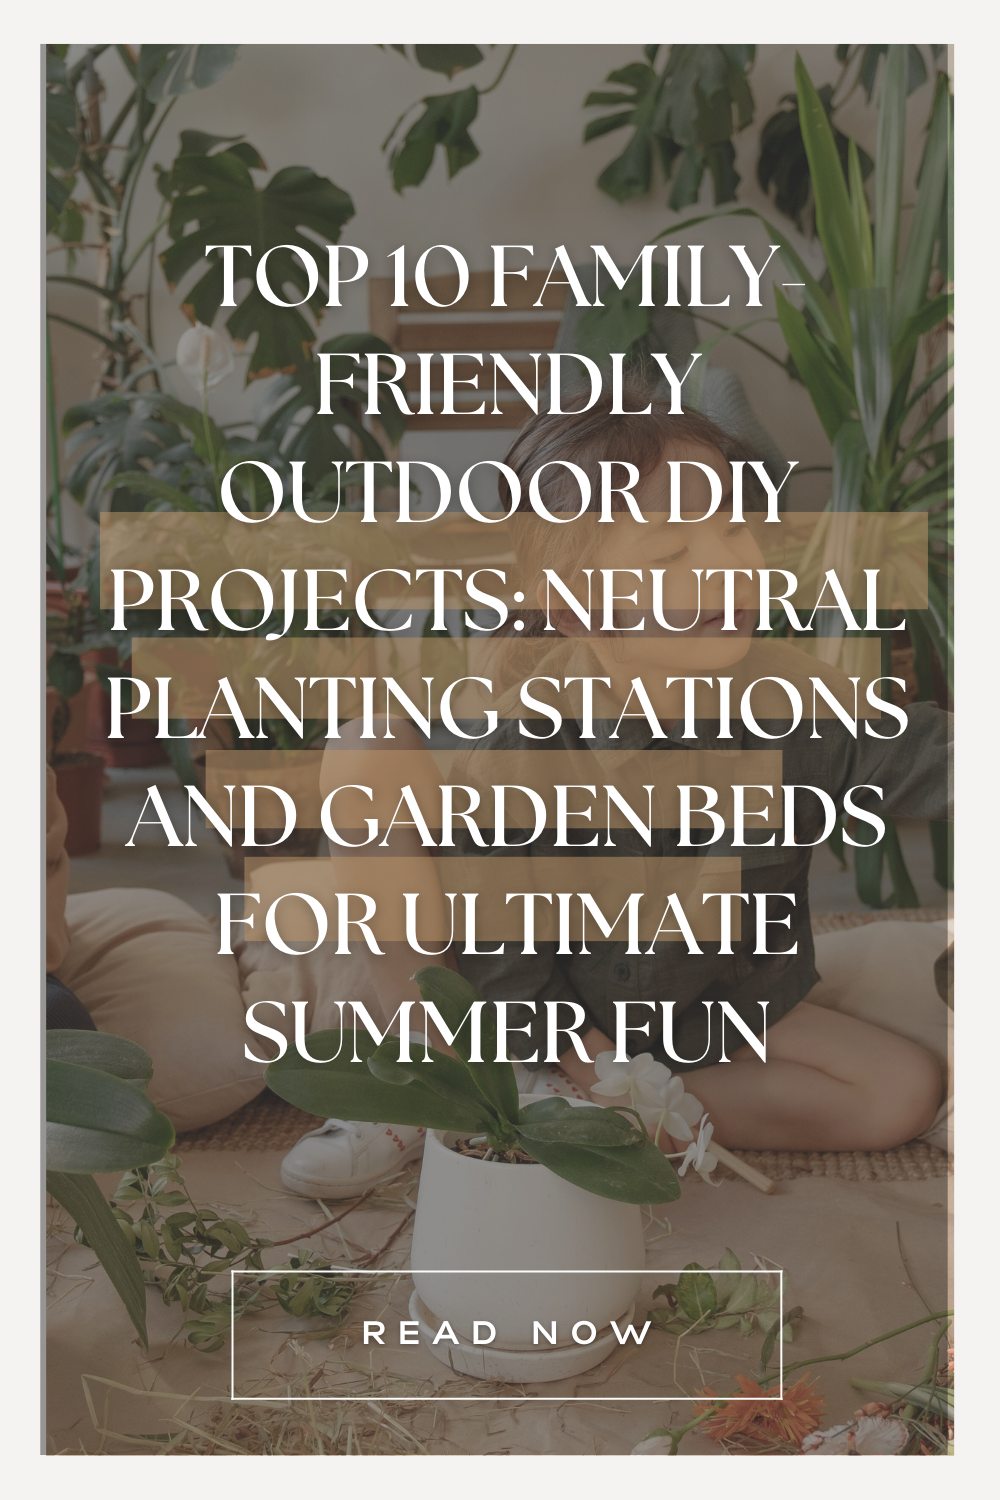
Summer is the perfect season to cultivate creativity in your outdoor space, and what better way to do this than through family-friendly DIY projects? If your style is minimalist, neutral, and effortlessly chic, these DIY planting stations and garden beds will elevate your backyard and keep the kids entertained. Let's dig into these trending Pinterest-inspired projects that are both beautiful and functional!
1. DIY Neutral Potting Bench Station
Create a minimalist gardening nook using reclaimed wood painted in shades of beige, taupe, or soft gray. Include built-in hooks, shelves, and a simple work surface. Shop this charming garden bench here.

Outdoor 3-seat Wood Bench 64 Inches Extra Long Acacia Chair With Seat Cushion — $155.99
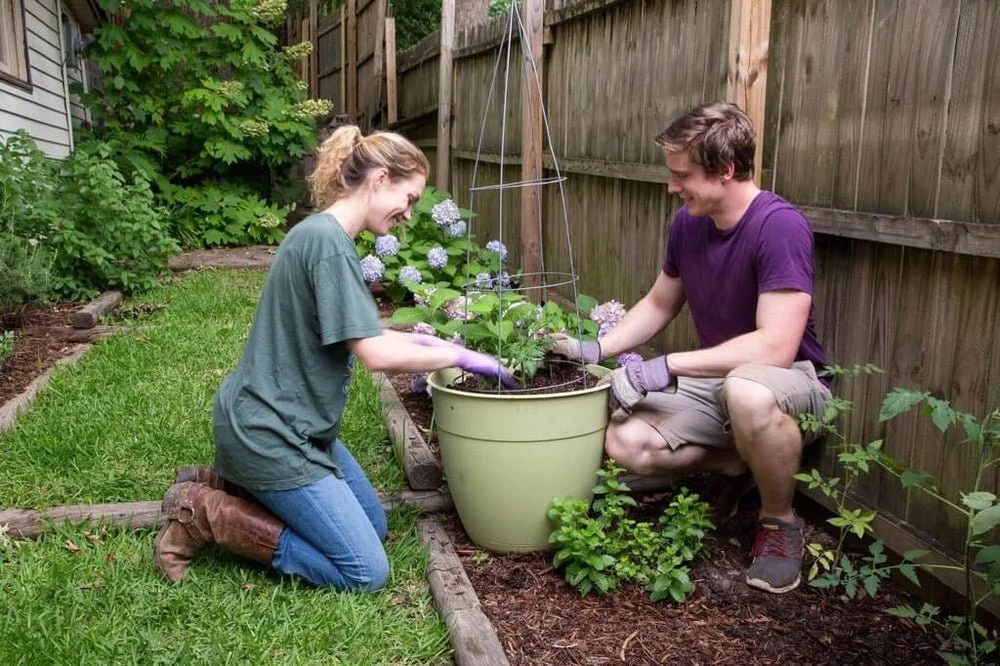
2. Raised Garden Beds with Neutral Finishes
Build raised garden beds from untreated pine or cedar wood. Choose neutral, earth-friendly stains for a timeless look. Bonus: Grab this beginner-friendly guide to building raised beds.

Original Cedar Raised Garden Bed, 2' X 10' X 10.5" — $204.78
3. Vertical Pallet Garden in Earth Tones
Repurpose wooden pallets into chic vertical planters painted in neutral hues, ideal for small spaces. Get your pallet garden DIY kit here.

DIY Wooden Vertical Garden Planter Guide - Step-by-Step Written Instructions — $24.99
4. Minimalist Concrete Planters
Use quick-setting concrete molds to make neutral, modern-style planters. Kids love personalizing these. Check out this easy DIY concrete planter mold.

Garden Tower Concrete Mold Set — $150
5. Family-Friendly Herb Garden Station
Create a herb-growing station with wooden planter boxes labeled with neutral, minimalist tags. Download your free printable herb labels here.

Handmade solid walnut, maple, cherry, or mahogany hardwood for self watering planters — $24.50+
6. DIY Succulent Garden Bed
Make a low-maintenance succulent garden bed featuring sandy-colored gravel, rocks, and drought-tolerant plants for a tranquil corner. Succulent starter set.

Cute Farms Terrarium Starter Kit — $29.95
7. Neutral Mud Kitchen Planting Area for Kids
Combine outdoor play with gardening. Build a mud kitchen in soft, earthy shades, complete with planting pots and soil stations. Shop kid-friendly mud kitchen accessories.

Costway Wooden Play Kitchen Set, Outdoor Kid's Mud Kitchen with Faucet & Water Box —
8. Neutral-Colored Painted Tire Planters
Repurpose old tires into vibrant planters, painted in neutral shades for a stylish yet eco-friendly garden project. See the DIY tire planter tutorial.

9. Mini Fairy Garden Beds
Create whimsical mini-gardens using wooden crates or ceramic pots filled with succulents, tiny pebbles, and neutral-colored miniatures. Peep one of your favorite whimsical ceramic pots.

Decorative Stoneware Planter with Birds on Rim and Reactive Glaze — $42.99
10. Neutral Outdoor DIY Plant Labels
Craft chic, minimalist plant markers using painted wooden spoons or popsicle sticks in neutral tones. Download your free printable plant labels.

WANT MORE TIPS LIKE THIS?
Don’t miss out on even more practical food hacks and family meal inspo! Subscribe below and get weekly tips, recipes, and real-life encouragement delivered straight to your inbox—because busy families deserve simple, stress-free mealtimes that work.

Beginner Gardening Essentials: Tools You Need to Get Started
It all begins with an idea.
Gardening is a rewarding hobby that connects you with nature while allowing you to cultivate beauty and fresh produce in your own backyard. If you’re new to gardening, having the right tools can make all the difference. In this guide, we’ll explore the essential tools every beginner gardener should have, along with tips on where to find them and budget-friendly options to get you started.
Must-Have Gardening Tools for Beginners
1. Trowel
A trowel is a small hand tool that’s indispensable for digging, planting, and transferring soil. Look for one with a comfortable grip and sturdy blade—stainless steel is a great option for durability.
2. Gardening Gloves
Protect your hands from dirt, thorns, and blisters with a good pair of gardening gloves. Opt for gloves with a snug fit and breathable material to ensure comfort and dexterity.
3. Pruning Shears
Also known as secateurs, pruning shears are essential for trimming plants, cutting back branches, and harvesting flowers or herbs. Choose a pair with sharp blades and an ergonomic handle.
4. Garden Fork
A garden fork is useful for loosening soil, turning compost, and aerating garden beds. For beginners, a lightweight fork with a comfortable handle is ideal.
5. Spade
A spade is a larger digging tool perfect for breaking ground, edging, and planting shrubs or trees. Look for one with a sharp blade and durable handle.
6. Watering Can or Hose
Keeping your plants hydrated is crucial. A watering can with a detachable spout is versatile for small gardens, while a hose with an adjustable nozzle works well for larger spaces.
7. Rake
A rake is invaluable for clearing leaves, leveling soil, and spreading mulch. Consider a lightweight, adjustable rake for added convenience.
8. Wheelbarrow
While not essential for smaller gardens, a wheelbarrow is a lifesaver for transporting heavy loads of soil, plants, or tools around larger spaces.
9. Garden Kneeler or Pad
Gardening often involves kneeling for extended periods. A garden kneeler or pad provides cushioning and reduces strain on your knees.
Where to Buy Gardening Tools
1. Local Garden Centres
Visit your local garden centre for expert advice and to see tools in person before purchasing. Many centres also offer seasonal sales.
2. Online Retailers
Websites like Amazon, eBay, and specialist gardening stores often have competitive prices and extensive selections. Look for customer reviews to ensure quality.
3. DIY and Home Improvement Stores
Stores like B&Q or Homebase in the UK stock a wide range of gardening tools, often with budget-friendly options.
4. Second-Hand Shops and Community Groups
Check out charity shops, car boot sales, or local community groups on Facebook for pre-loved tools at a fraction of the cost.
Budget-Friendly Tips for Beginner Gardeners
Start Small: Focus on a few essential tools to begin with and expand your collection as you gain experience.
DIY Solutions: Repurpose household items for gardening, such as using old kitchen utensils as makeshift tools.
Watch for Sales: Keep an eye out for seasonal deals at local stores or online retailers.
Borrow or Share: If you have gardening friends or neighbours, consider borrowing tools or pooling resources.
Wrapping Up
Gardening for beginners doesn’t have to be daunting or expensive. By investing in a few essential tools like a trowel, gloves, and pruning shears, you’ll be well-equipped to start your gardening journey. Explore local and online stores for affordable options, and don’t hesitate to get creative with DIY solutions. With the right tools in hand, you’ll be ready to nurture your garden and enjoy the fruits of your labour.
Happy gardening!
Gardening is a rewarding hobby that connects you with nature while allowing you to cultivate beauty and fresh produce in your own backyard. If you’re new to gardening, having the right tools can make all the difference. In this guide, we’ll explore the essential tools every beginner gardener should have, along with tips on where to find them and budget-friendly options to get you started.

5 Indoor Plants to Start Your Green Thumb Journey
It all begins with an idea.
Starting your indoor plant collection can be an exciting and rewarding experience. Even if you’re new to houseplants, choosing the right ones can set you up for success. In this guide, we’ll discuss five easy-to-care-for indoor plants perfect for beginners, along with helpful care tips and where to find them.
1. Pothos (Epipremnum aureum)
Known as the "Devil’s Ivy," pothos is a hardy plant that thrives in almost any environment. Its trailing vines and heart-shaped leaves make it a beautiful addition to any space.
Care Tips:
Light: Prefers indirect light but can tolerate low-light conditions.
Water: Allow the soil to dry out between waterings.
Maintenance: Trim occasionally to manage growth and promote bushiness.
Where to Buy:
Pothos plants are widely available at garden centres, home improvement stores, and online retailers like Amazon.

2. Snake Plant (Sansevieria)
Also called the "Mother-in-Law’s Tongue," the snake plant is nearly indestructible and perfect for those with a busy lifestyle.
Care Tips:
Light: Thrives in bright, indirect light but tolerates low light.
Water: Water sparingly; let the soil dry completely between waterings.
Maintenance: Wipe leaves occasionally to remove dust.
Where to Buy:
Snake plants are commonly sold in garden shops, supermarkets, and online platforms like Etsy.

3. Succulents
Succulents come in a variety of shapes and sizes, adding charm to your indoor garden. They store water in their leaves, making them ideal for forgetful plant parents.
Care Tips:
Light: Need plenty of bright, direct sunlight.
Water: Water deeply but infrequently, allowing soil to dry completely.
Maintenance: Rotate occasionally for even growth.
Where to Buy:
You can find succulents at local nurseries, IKEA, or dedicated online shops like Succulent Studios.

4. Spider Plant (Chlorophytum comosum)
Spider plants are known for their arching leaves and small offshoots or "babies" that dangle from the main plant.
Care Tips:
Light: Bright, indirect sunlight is ideal.
Water: Keep the soil slightly moist but avoid overwatering.
Maintenance: Repot when roots become crowded.
Where to Buy:
Spider plants are available at garden centres, farmer’s markets, and online retailers like The Sill.

5. Peace Lily (Spathiphyllum)
With its elegant white blooms, the peace lily is not only easy to care for but also helps purify the air.
Care Tips:
Light: Prefers low to medium light.
Water: Keep the soil consistently moist but not soggy.
Maintenance: Remove yellowing leaves and wipe the leaves to keep them dust-free.
Where to Buy:
You can purchase peace lilies from local florists, home improvement stores, or online shops like Bloomscape.
Beginner Houseplant Care Tips
Start Small: Begin with one or two plants to build confidence.
Consistency is Key: Establish a routine for watering and checking your plants.
Monitor: Keep an eye out for signs of overwatering or pests.
Use Proper Pots: Ensure your pots have drainage holes to prevent root rot.
Wrapping Up
Starting your houseplant journey doesn’t have to be intimidating. With easy indoor plants like pothos, snake plants, and succulents, you’ll be nurturing your green thumb in no time. Explore local nurseries, online retailers, and even friends with plant cuttings to begin your collection. Happy planting!

Unleash the Potential of Your Small Outdoor Space with These Garden Makeover Ideas
It all begins with an idea.
Are you tired of looking at your small outdoor space and feeling like it's lacking something special? Well, it's time to turn that neglected corner into a garden oasis with these transformative makeover ideas. From maximizing your space to creating a cozy seating area, choosing the right plants, and diving into some fun DIY projects, you'll learn everything you need to know to unleash the full potential of your tiny backyard. Get ready to be inspired and start on the journey to creating the garden retreat of your dreams.
Maximizing Space: Tips for optimizing every inch of your small outdoor area
When it comes to maximizing the space in your small outdoor area, every inch counts. One tip for optimizing your space is to use vertical gardening techniques, such as hanging planters or trellises, to take advantage of height and create more planting opportunities. Additionally, utilizing multi-functional furniture that can serve as storage as well as seating can help you make the most of your limited square footage. Don't forget to consider the layout of your space carefully, ensuring that every corner is utilized effectively - whether it's for planting, seating, or entertaining. By strategically planning and organizing your small outdoor area, you can make it feel larger and more functional.

Transitioning into creating a cozy seating area, let's dive into how you can design a comfortable and inviting space for relaxing and enjoying your garden oasis.
Creating a Cozy Seating Area: How to design a comfortable and inviting space
Transitioning into creating a cozy seating area, let's dive into how you can design a comfortable and inviting space for relaxing and enjoying your garden oasis. When it comes to choosing the right plants for your seating area, selecting vibrant flowers and greenery can enhance the overall aesthetic and create a peaceful atmosphere for you to unwind in.

Choosing the Right Plants: Selecting vibrant flowers and greenery for your garden
Transitioning into selecting vibrant flowers and greenery for your garden, you can elevate the visual appeal of your outdoor space and create a serene environment to relax in. When choosing plants, consider a mix of colors, textures, and heights to add depth and interest to your garden. Opt for low-maintenance options like succulents or native plants that can thrive in your particular growing conditions. By carefully curating your plant selection, you can create a beautiful atmosphere that complements your seating area and enhances the overall ambiance of your garden.
This attention to detail in choosing the right plants can truly transform your small outdoor space into a lush and vibrant haven. Next, we'll explore some easy and budget-friendly DIY projects to further enhance your garden oasis.

DIY Projects: Easy and budget-friendly ideas to enhance your outdoor space
In addition to carefully selecting the perfect plants for your garden, there are plenty of DIY projects that can help elevate your outdoor space without breaking the bank. Consider adding simple touches like hanging string lights or creating a cozy seating area with DIY pallet furniture. You could also repurpose old containers into charming planters or build a vertical garden to maximize your space.
Another budget-friendly idea is to create a DIY herb garden that not only adds a pop of freshness to your outdoor space but also provides you with a convenient source of herbs for cooking. Additionally, incorporating a water feature, such as a small fountain or pond, can add a relaxing element to your garden oasis.
By incorporating these easy and cost-effective DIY projects into your small outdoor space, you can take your garden makeover to the next level and create a truly inviting and personalized retreat that you'll love spending time in.

In conclusion, transforming your small outdoor space into a lush garden oasis is completely achievable with the right strategies in place. By maximizing space, creating a cozy seating area, choosing the right plants, and incorporating DIY projects, you can elevate your outdoor area into a tranquil paradise. Remember, it's all about making the most of what you have and infusing your personal style into every detail. So why wait? Start implementing these garden makeover ideas today and watch as your tiny backyard blossoms into the garden of your dreams. As Audrey Hepburn once said, "To plant a garden is to believe in tomorrow."

From Boss Babe to Intentional Living: 5 Holistic Practices for a More Mindful Southern Lifestyle
It all begins with an idea.

This blog post may contain affiliate links, which means I may earn a small commission if you make a purchase through these links, at no extra cost to you. I only recommend products and services that I genuinely love and believe will add value to your life. Your support helps keep this blog running—thank you!
Are you tired of the fast-paced 'boss babe' lifestyle and craving a more intentional and mindful way of living in the charm of the South? As someone who has traveled that same path, I am excited to share with you 5 holistic practices that can help you transform your daily routine and embrace a more mindful lifestyle. From embracing mindfulness in everyday moments to nourishing your body and soul with wholesome foods, get ready to discover a new way of living that brings peace, clarity, and connection. Join me on this journey towards a more intentional and holistic way of life.
Embracing Mindfulness in Everyday Moments
To truly embrace a more mindful lifestyle, it's essential to find ways to bring mindfulness into your everyday moments. Whether you're sipping a cup of sweet tea on the porch, taking a leisurely stroll down a tree-lined street, or simply pausing to appreciate the beauty of a blooming magnolia tree, there are countless opportunities to cultivate mindfulness in your daily life. By focusing on the present moment and being fully present in everything you do, you can start to experience a greater sense of peace, gratitude, and connection to the world around you.

Nourishing Your Body and Soul with Wholesome Foods
One of the most important aspects of a mindful Southern lifestyle is nourishing your body and soul with wholesome foods. In the South, food is not just sustenance; it's a way of life. From hearty stews simmering on the stove to freshly baked cornbread straight out of the oven, Southern cuisine is steeped in tradition and flavor. By focusing on incorporating fresh, locally sourced ingredients into your meals, you can nourish your body with the nutrients it needs while also supporting local farmers and businesses. Whether it's indulging in a plate of fried green tomatoes or savoring a slice of pecan pie, every bite can be a mindful experience that connects you to the rich culinary heritage of the South.
By being intentional about the food you eat, you can create a more sustainable and eco-friendly home that reflects your values and commitment to mindful living.
Creating a Sustainable and Eco-Friendly Home
Incorporating sustainable practices into your home not only benefits the environment but also promotes a more intentional and mindful way of living. By reducing waste, conserving energy, and utilizing eco-friendly products, you can create a living space that aligns with your values and supports a holistic lifestyle. From choosing energy-efficient appliances to implementing composting and recycling systems, every decision you make in your home can contribute to a more sustainable future for yourself and the planet.
The one subscription box that has legit saved my life in this whole transition: Beachly — Check out my review here and how you can snag a box too!
This focus on sustainability extends beyond just the food we eat, shaping our entire living environment. By creating a sustainable and eco-friendly home, you can further deepen your connection to the natural world and foster a sense of inner peace and clarity that comes from living in harmony with the Earth.,
Connecting with Nature for Inner Peace and Clarity
One powerful way to enhance your mindfulness and foster a deeper sense of inner peace and clarity is by connecting with nature. Spending time outdoors, whether it's in your own backyard, a local park, or a nearby nature preserve, can have profound effects on your mental well-being. The sights, sounds, and smells of the natural world can help you to slow down, ground yourself, and appreciate the beauty and wonder that surrounds you.
Whether you choose to take a leisurely walk through the woods, practice yoga in a sunny meadow, or simply sit quietly and observe the birds and butterflies in your garden, immersing yourself in nature can provide a much-needed respite from the stress and busyness of everyday life. It allows you to be present in the moment, quieting the chatter of your mind and allowing you to access a sense of calm and clarity that is often elusive in our modern, fast-paced world.

By making a conscious effort to connect with nature on a regular basis, you can cultivate a deeper sense of inner peace and clarity that will benefit all areas of your life. This practice can help you to feel more grounded, centered, and balanced, making it easier to navigate the challenges and complexities of daily living. In addition, spending time in nature can also inspire gratitude, awe, and a sense of interconnectedness with the natural world, fostering a deeper appreciation for the beauty and abundance that surrounds us.
By nurturing a strong connection with nature, you can tap into a wellspring of inner peace and clarity that will serve as a solid foundation for cultivating healthy relationships and community.
Cultivating Healthy Relationships and Community
By making a conscious effort to connect with nature on a regular basis, you can cultivate a deeper sense of inner peace and clarity that will benefit all areas of your life. This practice can help you to feel more grounded, centered, and balanced, making it easier to navigate the challenges and complexities of daily living. In addition, spending time in nature can also inspire gratitude, awe, and a sense of interconnectedness with the natural world, fostering a deeper appreciation for the beauty and abundance that surrounds us.
By nurturing a strong connection with nature, you can tap into a wellspring of inner peace and clarity that will serve as a solid foundation for cultivating healthy relationships and community. Building and maintaining healthy relationships with others is essential for overall well-being. Surrounding yourself with supportive and loving individuals who share your values and beliefs can enrich your life and provide a sense of belonging.

In a mindful Southern lifestyle, community plays a vital role in fostering connections and building a sense of unity. Engaging with your community through acts of kindness, volunteering, or simply spending quality time with loved ones can strengthen bonds and create a network of support. By cultivating healthy relationships and actively participating in your community, you can create a more fulfilling and meaningful life for yourself and those around you.
In a world filled with hustle and bustle, it's easy to get caught up in the 'boss babe' lifestyle, but there is a more intentional and mindful way to embrace southern living. By incorporating practices like mindfulness, nourishing your body with wholesome foods, creating a sustainable home, connecting with nature, and cultivating healthy relationships, you can transform your life into a beautiful tapestry of holistic living. Start small, take it one step at a time, and watch as your life blossoms into a new chapter of intentional living.
Are you ready to make the change? Embrace the journey towards a more mindful southern lifestyle, and let your holistic practices guide you towards a life filled with peace, connection, and purpose.

Gardening Mistakes I Made (And How You Can Avoid Them)
It all begins with an idea.
Gardening is a journey filled with learning, patience, and the occasional misstep. When I first started, I made my fair share of mistakes. But each one taught me valuable lessons that helped me become a better gardener. In this blog, I’ll share the most common gardening mistakes I made and practical tips to help you avoid them.
Mistake 1: Overwatering Plants
I thought more water equalled healthier plants. Unfortunately, overwatering led to root rot and yellowing leaves.
Lesson Learned:
Understand your plants’ water needs. Some thrive in moist soil, while others prefer it dry.
Check soil moisture by sticking your finger about an inch deep. If it feels dry, it’s time to water.
Use pots with drainage holes to prevent water from pooling.
Mistake 2: Planting Without Considering Sunlight
In my enthusiasm, I planted sun-loving flowers in shady spots, leading to leggy stems and poor blooms.
Lesson Learned:
Observe your garden’s sunlight patterns throughout the day.
Group plants based on their light requirements: full sun, partial shade, or full shade.
Use plant labels or research to understand what each plant needs.
Mistake 3: Neglecting Soil Preparation
I underestimated the importance of healthy soil and planted directly into compact, nutrient-poor dirt.
Lesson Learned:
Test your soil’s pH and nutrient levels with an at-home kit.
Add compost or organic matter to improve soil structure and fertility.
Turn the soil to aerate it and remove rocks or debris.
Mistake 4: Ignoring Spacing Recommendations
I planted too closely, thinking it would create a lush garden. Instead, plants competed for resources, leading to stunted growth.
Lesson Learned:
Follow spacing guidelines on seed packets or plant labels.
Remember that plants will grow larger over time and need room to thrive.
Thin out seedlings if they’re overcrowded.
Mistake 5: Forgetting to Mulch
I skipped mulching because I didn’t think it was necessary. This led to weeds taking over and moisture evaporating too quickly.
Lesson Learned:
Apply a layer of mulch (like wood chips or straw) around your plants.
Mulch helps retain moisture, regulate soil temperature, and suppress weeds.
Keep mulch a few inches away from plant stems to prevent rot.
Mistake 6: Not Researching Pests and Diseases
When pests appeared, I didn’t know how to manage them, which led to damaged plants.
Lesson Learned:
Familiarise yourself with common pests in your area and their natural predators.
Inspect plants regularly for signs of trouble, like holes in leaves or discolouration.
Use organic pest control methods, such as neem oil or introducing beneficial insects.
Mistake 7: Taking on Too Much Too Soon
I ambitiously started with a large garden, which quickly became overwhelming.
Lesson Learned:
Start small and expand as you gain confidence.
Focus on a few easy-to-grow plants before tackling more challenging ones.
Create a schedule for watering, weeding, and fertilising to stay organised.
Wrapping Up
Gardening is a learning experience, and mistakes are part of the process. By sharing my missteps, I hope to spare you some of the frustration I faced and set you up for success. Remember, every gardener starts somewhere, and even seasoned pros are constantly learning. So grab your gloves, embrace the journey, and enjoy watching your garden grow.
Happy gardening!

The Power of Letting Go: Decluttering Your Mind and Home
It all begins with an idea.
Have you ever experienced physical or mental pandemonium that overtook you? These two elements are frequently related. We may feel worried, stuck, or unfulfilled as a result of the disarray in our surroundings, which can reflect our internal issues. But there is a path forward; we may make room for clarity, serenity, and purpose by letting go of things that no longer serve us.
Relationship Between the Soul and Clutter
The process of letting go is both spiritual and practical. Whether it's tangible belongings or psychological baggage, clutter may weigh us down and divert us from the pleasant life we were meant to live. We can shift our focus from material possessions and regrets of the past to the present by getting rid of things we no longer require. This act of surrender can result in fresh joy and mental clarity.
Decluttering is more than just the cleaning!
Whenever I think about it, I feel like It's more about making our surroundings and ourselves a haven. It's frequently hard to feel at ease in a messy environment. We allow ourselves to breathe and develop when we align our surroundings with the simplicity and orderliness that the spirit longs for. We can enter a new chapter unencumbered and burden-free when we let go of things that are connected to unpleasant memories or unfulfilled goals.
Useful Advice for Decluttering Start small if the thought of decluttering seems intimidating. Here are some ideas to assist you:
Ask God to lead you: Involve God in the process of decluttering. Look for guidance on what to preserve and what to discard. Allow your emotions to lead you, believing that divine insight will show you the way.
Address One Aspect at a Time Concentrate on just one drawer, shelf, or nook. Gaining momentum might be facilitated by little triumphs. Always keep in mind that progress is more significant than perfection.
Make use of the "3-Box Method." Mark three boxes: Discard, Donate, and Keep. Examine each item carefully, then put it in the appropriate box. Consider whether the thing makes you happy or has a meaningful purpose.
Set time limits. Set aside 15-30 minutes each day for decluttering. This technique makes the task more manageable and less daunting. Consistency throughout time produces great progress.
Reflect on Emotional Clutter. Decluttering extends beyond physical stuff. Consider journaling or talking with a trusted friend about any mental and emotional burdens you need to let go. Identifying and resolving these internal concerns can be as liberating as organizing your house.
Celebrate Your Progress Each step you take toward simplifying your life is an accomplishment. Reward yourself in small, meaningful ways. This will keep you motivated and reinforce the positive changes you are making.
The Decluttering Ripple Effect
The effects of decluttering are not limited to your immediate surroundings. Emotional equilibrium and mental clarity frequently accompany the creation of physical space. Simplifying your environment might encourage you to reassess your priorities, cultivate relationships, and follow your passions.
Stronger bonds with loved ones can also be fostered by a decluttered home. You can concentrate on making memories and fostering a cozy, loving environment when there are fewer interruptions and disturbances. Giving up things you no longer need can also help others. Giving useable goods to charities revitalizes them and aids individuals in need, starting a positive feedback loop of thankfulness and generosity.
My Story
I remember a period of time when my house reflected my inner turmoil. Closets were full, drawers were bursting, and I had a million "what-ifs" running through my head. The choice to give God my junk came to me one day. The trip was stressful since it was hard to give up emotional objects and ingrained behaviors.
Prayer and patience helped me to eliminate the mental and physical clutter that had been impeding my progress. The result was revolutionary. My mind felt lighter, and my home became a more peaceful environment. Letting go provided me with a renewed sense of energy and purpose.
Letting go is one of the most powerful ways of self-care. You create space for clarity by decluttering your home and mind. Not only that, you also begin to notice tiny pleasures of life, the way sunlight filters through a clean window or the tranquility of a calm moment free of interruptions and so much more! Letting go does not mean losing; rather, it means obtaining the freedom to live genuinely and consciously.
In conclusion. Cleaning your house and your head is a deep act of self-care!